
|
Click for HI-RES image |
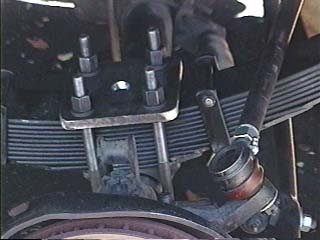
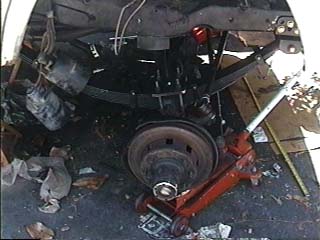
view of front-suspension being installed. Spring-hangers have been installed (temporary mock-up), & springs put in. Axle about ready to be U-bolted on (temporary mock-up), to check caster & drag-link clearance. |
 Click for HI-RES image |
above, closeup view of front-axle being prepped. The area on the axle where the spring-pads will be welded have been ground smooth (looks "silvery"). In the background, you can see the evaporative-fuel-canister hanging down. The drop-bracket for the radius arm (removed later on with a gas torch), is visible on the right side. |
 Click for HI-RES image |
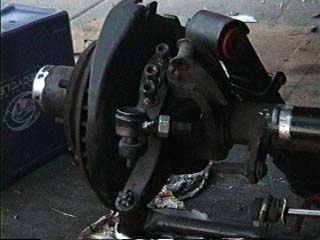
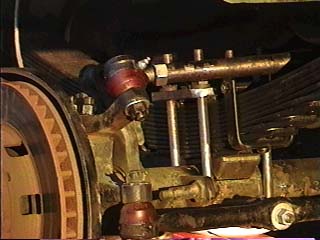
above, closeup view of steering knuckle on passenger side. Shows the steering arm (with nuts loosened. I couldn't get the arm off!?). You can see the ball-joint on the steering arm, with brand-new jam-nut. Later on, the drag-link had to be shortened (since the van is being lowered). Note the front spring leaning against the axle, with the red-urethane bushing. |
 Click for HI-RES image |
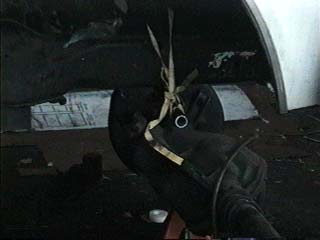
closeup view from passenger side. Shows the drag-link tied up. It has been shortened, ready for installation. There was so much shortening required, I ran out of threads (for the end ball-joint). I actually had to buy a 3/4" tap to make deep enough threads. |
 Click for HI-RES image |
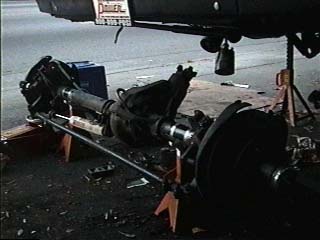
overall view, showing axle u-bolted to springs (temporary mock-up), to check caster & drag-link clearance. Tires about to be installed, to check for wheel-well clearance & straightness. |
 Click for HI-RES image |
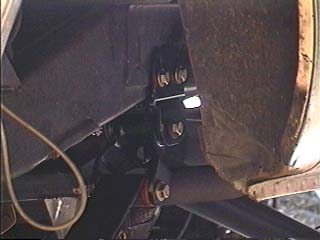
closeup view of rear spring hanger, at full-droop. Basically, 2 U-shaped pieces bolted together (temporary mockup). (Later on they would be removed & welded together). The hanger is 1/4" thick steel (made from box-section, with one side removed). 2 grade 8 1/2" bolts are used to hold it to the frame (later on the bracket will be welded to the frame as well) The shackle was bought from Offroad-Unlimited (Burbank, CA), from their Ford F-350 reverse-shackle kit. Yes, I'm using (custom) 3" wide-springs (like a Ford) on the Dodge! Talk about using hybrid components.. |
 Click for HI-RES image |
view of front-axle u-bolted to the front-springs (temporary mock-up) at full-droop. The u-bolt anchor plates were custom made from 1/2" thick steel plate. The drag-link was shortened, & installed (you can see it has enough clearance). The evaporative fuel-canister is hanging down (had to be, in order to drill through the frame, to install the rear spring hanger). Note the tape-measure sitting on the ground. |
|
Click for HI-RES image |
closeup view of above, near the steering arm. The u-bolt anchor plates were custom made from 1/2" thick steel plate. The drag-link was shortened, & installed (you can see it has enough clearance). You can see the spring-pad in a temporary mock-up position (un-welded), to check for caster. |
 Click for HI-RES image |
another closeup view (different angle), near the steering arm. The u-bolt anchor plates were custom made from 1/2" thick steel plate. The drag-link was shortened, & installed (you can see it has enough clearance). You can see the spring-pad in a temporary mock-up position (un-welded), to check for caster. |
 Click for HI-RES image |
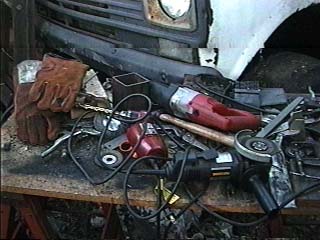
Main tool-bench (in backyard). You can see welding paraphenalia (gloves, & electrodes), Milwaukee Tools cut-saw, stubby 1/2" drill, Black&Decker Professional 4" grinder, vise-grips, files, etc. In the background, is my other 4x4 Chevy van. |
After confirming mock-up was OK (correct steering geometry, front-axle was straight with tires centerd in wheel wells), I disassembled everything.. What a drag!! I un-bolted the spring-hangars, & had them professionally welded (local Dick Cepek store, 2 blocks away).
Then, I re-installed everything. Except, the spring pads were still un-welded (but, I torqued the u-bolts to 120 ft-lbs). I gingerly went out on a test drive (careful not to apply sudden braking, thus shifting the spring pads) at midnight, around the block. Next morning, I drove 2 blocks to the local Dick Cepek, & let their mechanics finish up the welding. I.e., the springs pads on the axles & the spring-hangars on the frame. See pictures below.
 Click for HI-RES image |
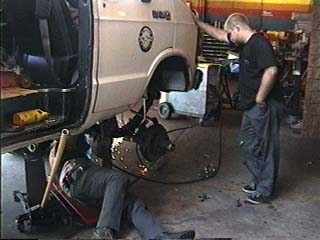
Mike is MIG welding the spring pad to the axle (after loosening the u-bolts). |
 Click for HI-RES image |
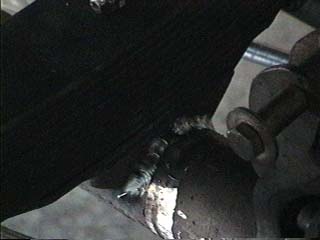
above, closeup view of the end-result |
 Click for HI-RES image |
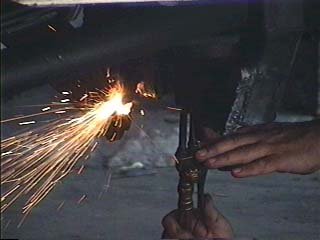
Mike is now gas torching off the (old) radius-arm drop-brackets. The oil actually caught on fire, but he just used the torch gas to extinguish it. |
 Click for HI-RES image |
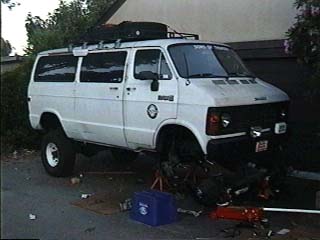
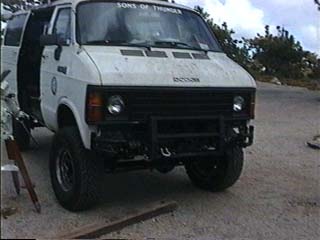
Project was completed in early August, but there was lengthy delay in receiving the custom-made rear leaf-springs. In the meantime, I drove it with the rear "jacked-up". I made the 1st off-road run on Oct. 8, for the Draconid Meteor Shower, to Mt. Pinos. I went to the summit (~9000 feet), on a knarly off-road trail. This picture was taken at my site. You can see the new bumper (partially completed) I designed/installed. |
 Click for HI-RES image |
UNDER CONSTRUCTION: come back until Dec 1 for additional images & |